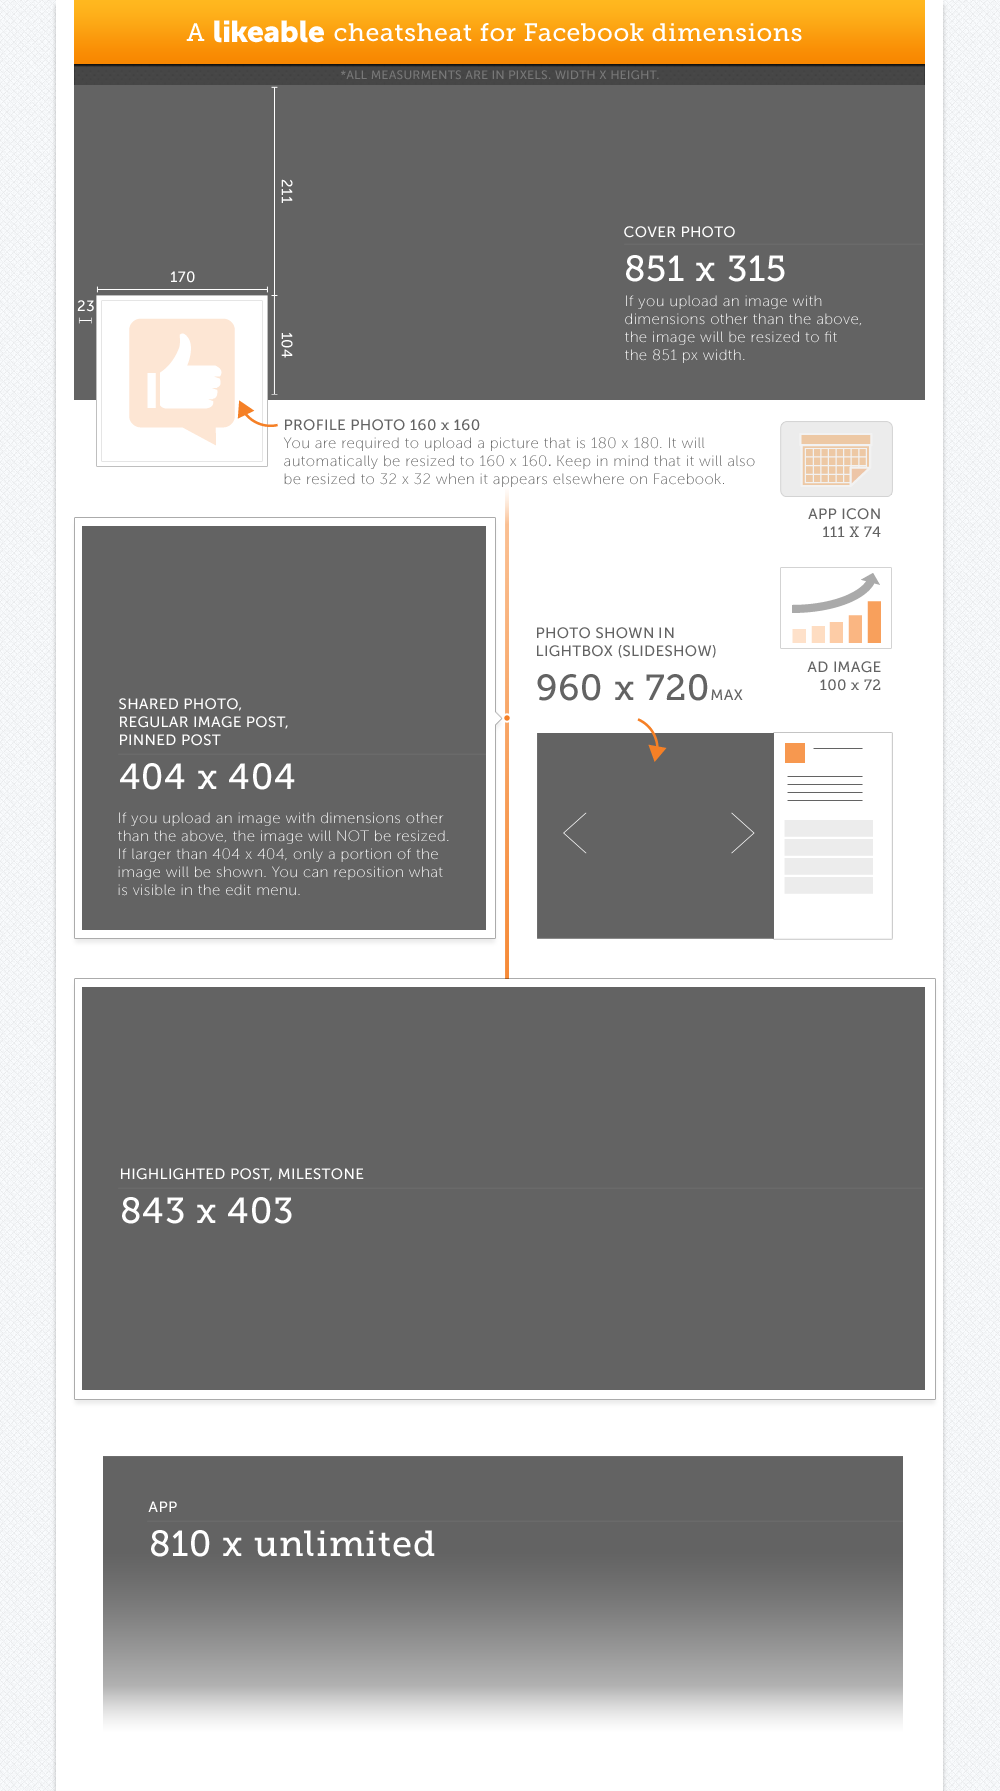
Facebook is a very image-heavy social network. From the cover photo, to each image post that keeps fans engaged, it is important that your visual content looks the best that it can to keep your community interested. One important factor in making sure everything looks good is uploading at the correct size. There are a lot of dimensions to know, but fortunately you don’t have memorize them! I’ve created a cheat sheet below that gives you all the dimensions you’ll need for Facebook.
Unfortunately, image compression always occurs when uploading to Facebook. This means it is unlikely that your image will maintain its original quality, which can be frustrating. But the good news is there are ways to minimize the “damage,” so to speak. If you are working in Photoshop, here are a few tips:
- Make sure you are working in the RGB color space and not CMYK, at 72 dpi.
- To counteract some of the changes that occur with Facebook’s compression, try increasing the saturation by around 10%, and then using smart sharpen.
- Use png or gif instead of jpeg.
- Images with flat color tend to appear more pixelated on Facebook. Consider breaking up solid color by adding texture to your image.
- With the exception of the profile photo, upload images at exact size so Facebook doesn’t resize your image.


